|
This document discusses how to process payments by checks,
wire transfers, and other methods that don't involve credit
card processing and web payment systems.
If a user chooses to pay by check or wire transfer, the account
registration and operation will include the following steps:
- The user goes through the registration wizard.
- Upon the completion of the wizard's last form, the account
is not activated. An invoice is e-mailed to the user
(see Setting up the address for users to send checks to).
A copy of this invoice is sent to your admin address (see Setting E-mail
below on how to specify this e-mail address). The invoice includes mailing address for check
payments or bank details for wire transfers.
- The user sends you a check or wires the amount specified in the invoice.
- You receive user's check or wire and enter the received amount into the system.
- Next you moderate the account, it becomes active,
and the system sends user an e-mail notification that the account has been created.
- User receives the notification e-mail and can log into the control panel.
- Further, user sends checks or makes wire transfers to pay the bills. Upon their receipt,
you enter the payments into the system.
- When the billing period closes, the account is not suspended and continues to operate,
and the payment owed becomes user's negative balance. When user's negative balance exceeds
the credit limit, this user will become unable to purchase more resources, which does not
allow the negative balance to grow too high over one billing period. See also
Suspending Debtors.
- When necessary, you can turn off check payments for the entire system.
Setting up the Check Mailing Address
Bank details or mailing address for checks is entered in the control
panel under Look and Feel -> Misc.Texts in the
Checks Information field. This text will show up in the
Welcome letter after the line:
"Please print out this message and send it along with payment to:"
Setting E-mail
To receive notifications about the creation of new accounts,
you have to specify your e-mail address.
- Select Notification Recipients from the Settings menu:
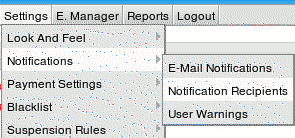
- On the page that appears,
specify the recipients of mail notifications.
Moderating Accounts
'Moderate' means complete account registration and activate the account.
Moderation is applicable to accounts that are paid for by checks, wire
transfers, web payment systems, and, optionally, credit cards. You moderate
an account when you receive the payment from the user.
To moderate an account:
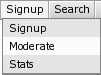
- Select Moderate in the Signup menu:
- In the page that appears, click the name of the account moderated:
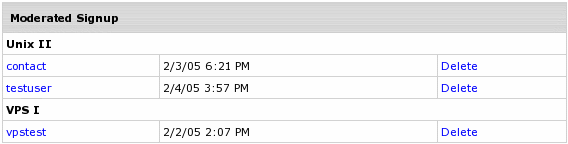
- Check customer details in the signup info thoroughly.
- Scroll down to the Moderation actions section and click Create at the bottom of the page:

- Once the account is created, an e-mail is sent to the user and you are brought to the Credit page.
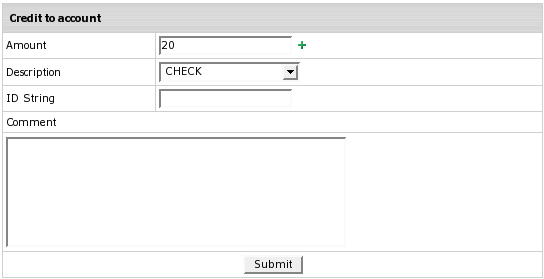
In the Amount field, enter the paid amount and click Submit.
You will get the message informing you that the payment has been added to the system:

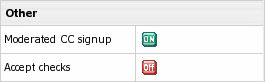
Turning Off Check Payments For the Entire System
If you want to disable check payments, it will affect the whole system, not individual plans. To do it:
- Select Merchant Gateway in the Settings menu.
- Turn Accept Checks OFF.
After you have disabled check payments, existing check payment users will still be able
to use this form of payment, but new customers won't see this option in the signup forms.
|